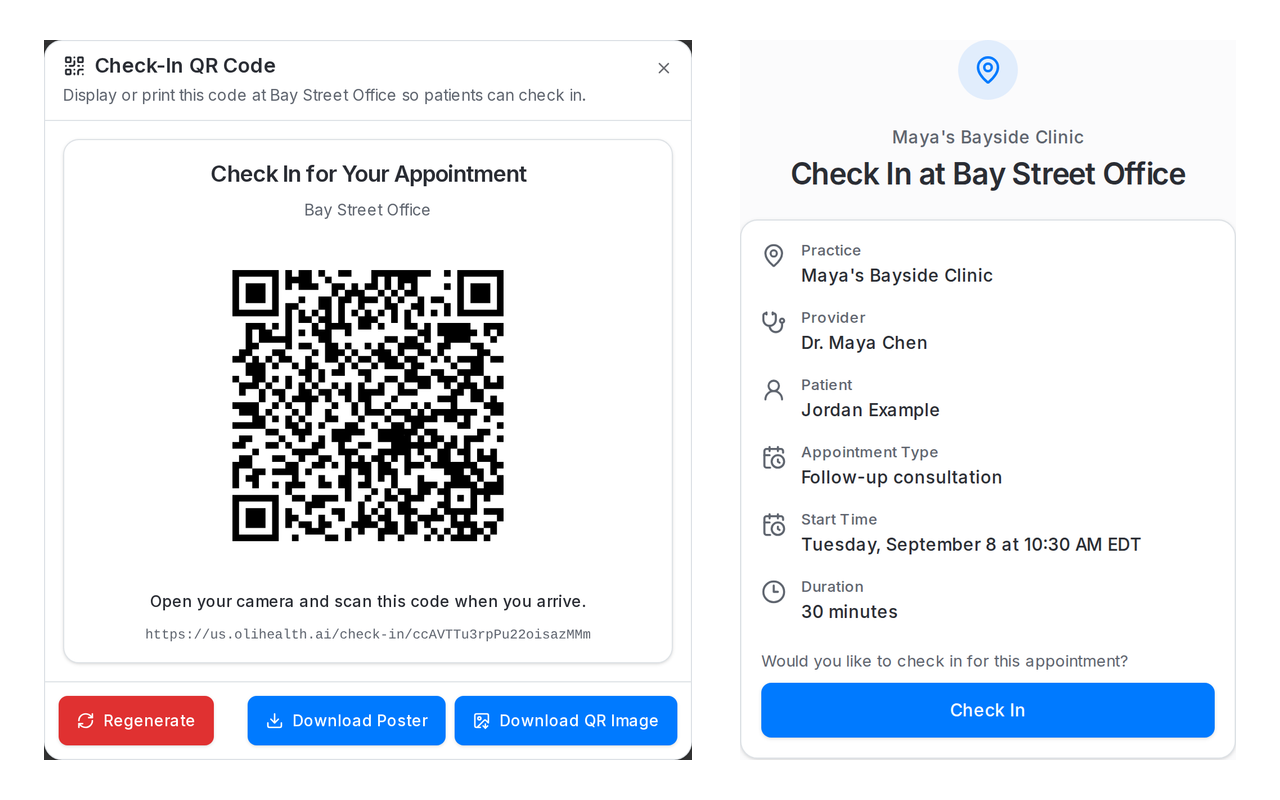
In an outpatient clinic, a client should not have to wait for a free receptionist just to say they have arrived. Yet that small exchange can become a bottleneck when the front desk is on a call, someone else is checking out, or several follow-up appointments start around the same time. The client is in the waiting room, but their provider may still be looking at an appointment marked Confirmed.
Oli's QR code check-in makes that arrival step self-service. Display a code at the clinic entrance or reception desk. Clients scan it on their own phone, find today's appointment through portal sign-in or an enabled guest lookup, and tap Check In. The appointment changes to Arrived, and Oli sends an arrival message and in-app notification to the provider without a receptionist having to relay it.
For outpatient teams, that means routine arrivals do not always need a separate front-desk interaction. Clients who are comfortable checking themselves in can do so while staff help someone with a question, a form, or a booking change. A solo practitioner can also receive the arrival notification without staffing a dedicated check-in desk. Self-service is an extra option, not a replacement for staff assistance, and it does not change the appointment time or guarantee a shorter wait to be seen.
This guide walks through both sides: setting up the code and using it as a client, with or without signing in to the patient portal.
All screenshots were captured from a running local Oli application using Maya's Bayside Clinic, a fictional example practice, and synthetic patient data. The demonstration QR code displays us.olihealth.ai but is not a live clinic check-in code. Use the code generated by your own practice, not the image in this article.
First, a scan is not the same as a check-in
Opening the QR link does not mark someone as arrived, and the QR code is not a password that signs them into their account. It opens the check-in page for that location.
From there, clients have two possible paths:
- Sign in to the patient portal. Oli uses their signed-in account to find appointments they can access at that location today. If they are already signed in in that browser, they can go straight to the appointment list.
- Use guest lookup, if the practice allows it. They enter the patient's legal last name and date of birth, then choose Find Appointment. No portal sign-in is needed for this path.
Both paths end with an appointment review and a separate Check In button. Clients should wait for the confirmation screen before assuming their arrival has been recorded.
Set up your location's QR code
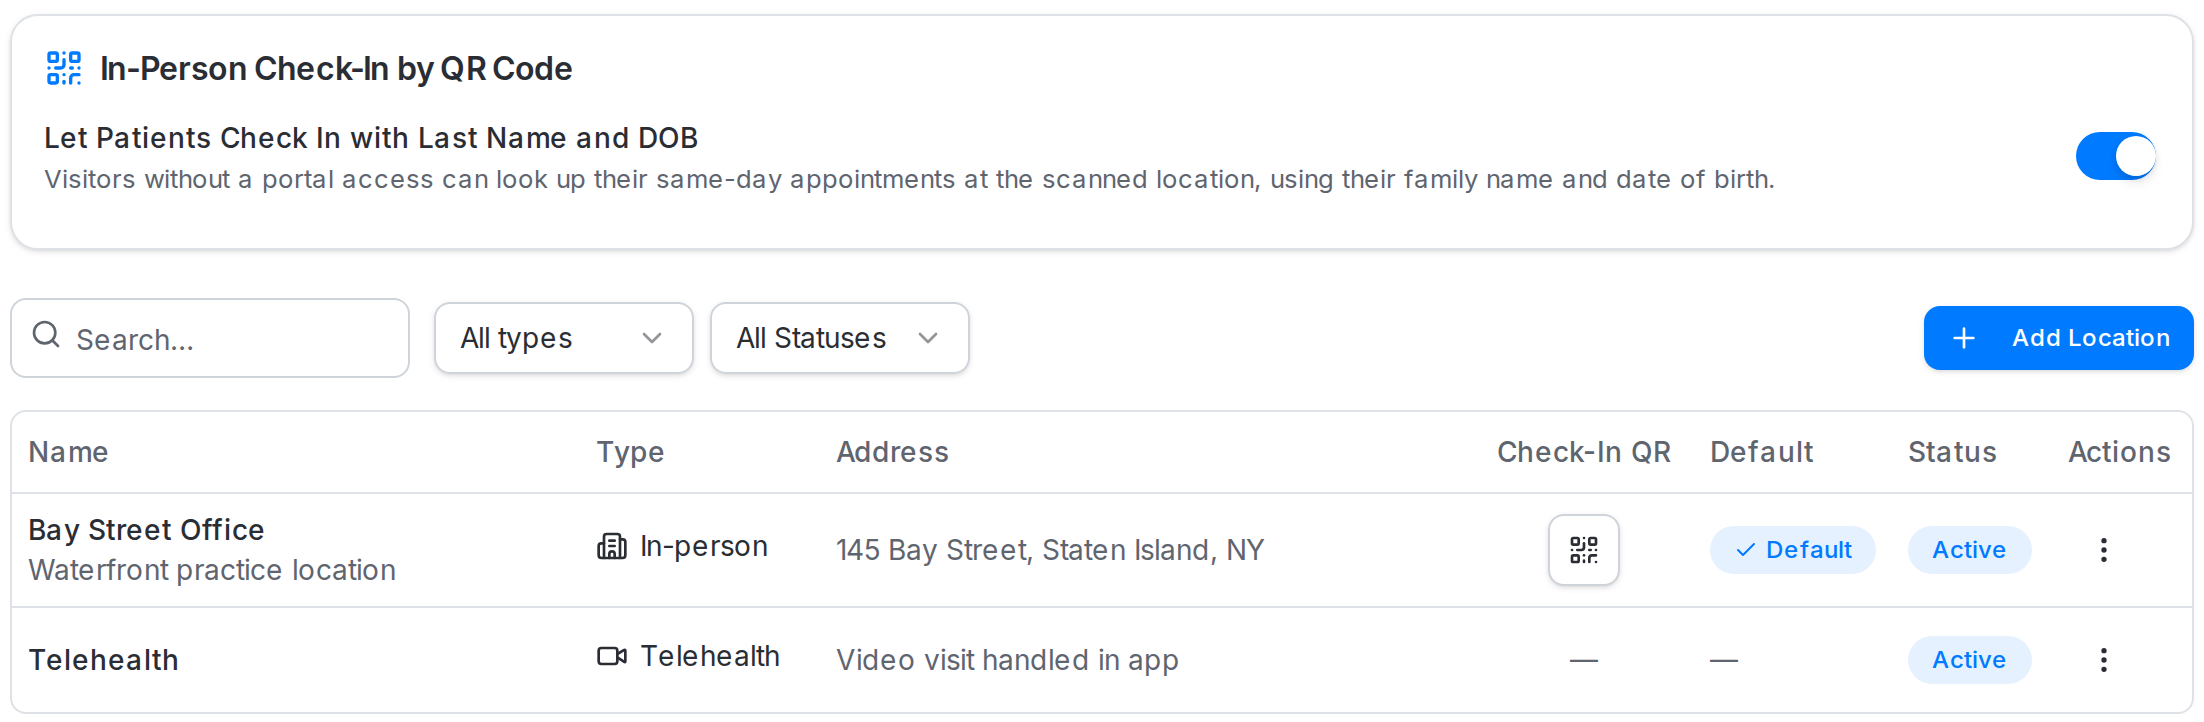
Sign in as a practice administrator and open Settings > Practice > Locations. Find the active In-person location where clients will be arriving. In its Check-In QR column, select the QR icon.
In this walkthrough, the practice is Maya's Bayside Clinic, and its in-person location is Bay Street Office.
The Check-In QR Code dialog shows the location name, the code, and a short instruction for clients. Oli creates a code when the location first needs one, so you do not need a separate QR generator or a new code for each appointment.
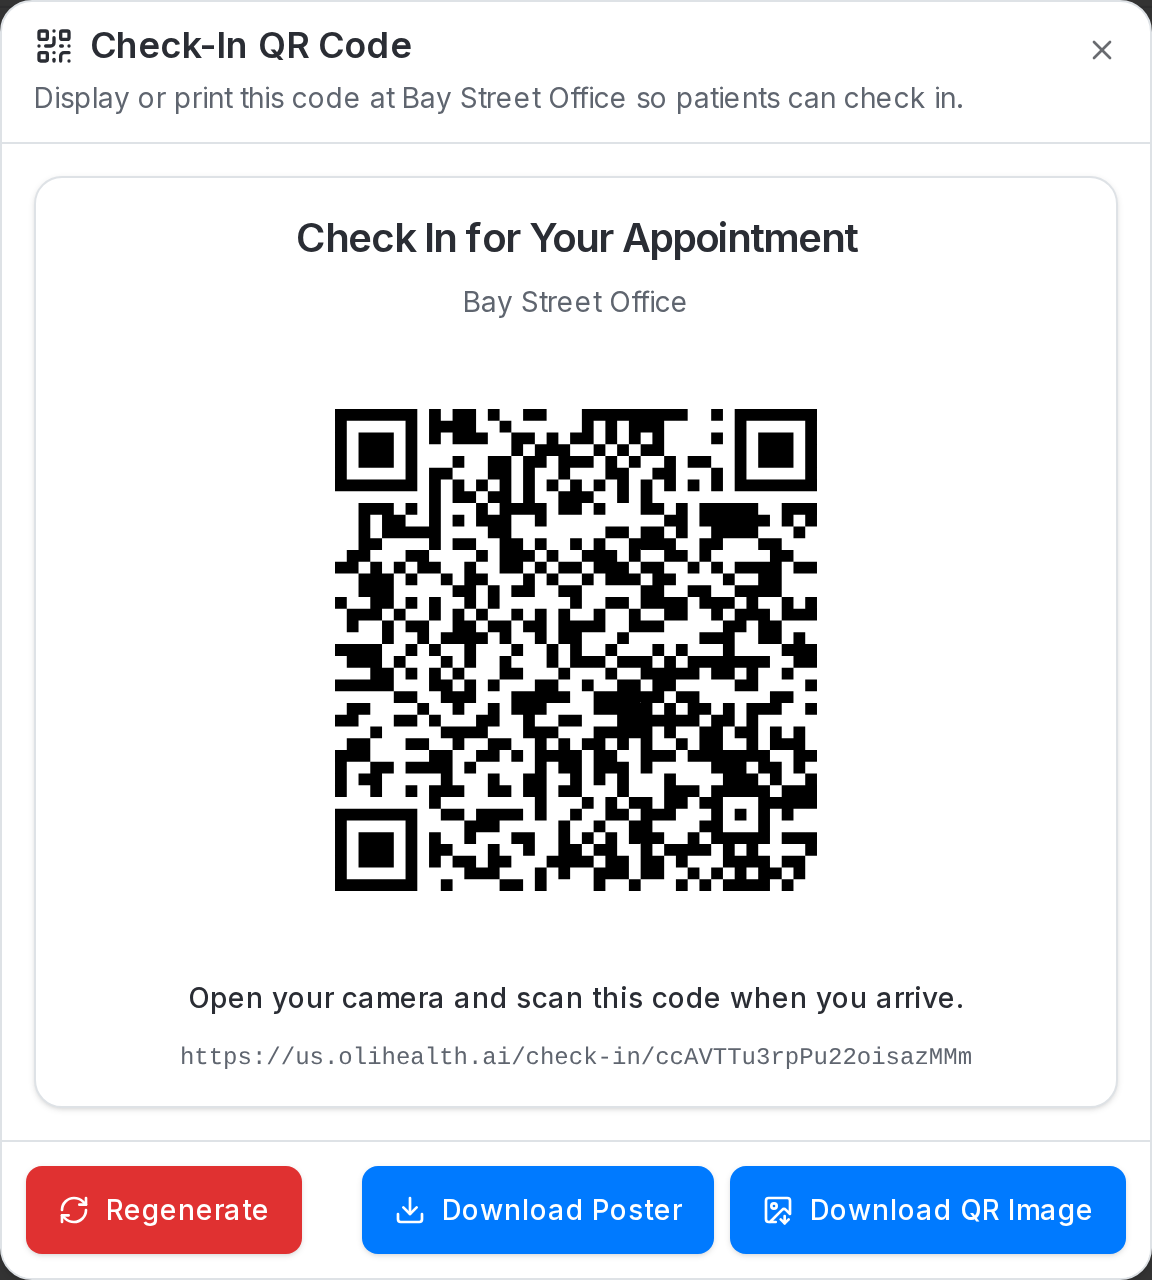
Choose Download Poster for the ready-made check-in sign, or Download QR Image to place the code in your own signage. Both downloads are PNG images. Put the sign where arriving clients can see and reach it, such as the reception desk or waiting-room entrance.
Each in-person location has its own code. If your practice has more than one office, check the location name before printing or displaying it. A code from another branch will not show this branch's appointments.
Before putting the sign into use, scan the downloaded or printed version with a phone. Keep the full code and its white border visible, and check for glare if it is behind a cover. Test from where a client would actually stand, not just with the phone held against the page.
Decide whether to allow check-in without signing in
At the top of Locations, Let Patients Check In with Last Name and DOB controls guest appointment lookup for the practice. Leave it enabled if clients should be able to find their appointment without a portal sign-in. Turn it off if you want the QR page to offer the sign-in path only.
This setting changes how clients identify their appointment. It does not remove the final Check In step or turn the QR code into access to their full patient portal.
What clients do when they arrive
1. Scan the code at the practice
Open the phone's camera, point it at the check-in code, and tap the link that appears. The check-in page opens in the browser, with no separate check-in app to install.
Check the practice and location names at the top of the page. If they do not match where the appointment is taking place, ask the front desk for the correct code.
2. Sign in, or find the appointment without signing in
Clients who use the patient portal can choose Sign In to Check In, complete the usual portal sign-in, and return to the check-in page. They do not need to enter their last name and date of birth as well. When the browser already has a valid client session, Oli can show the appointment list immediately.
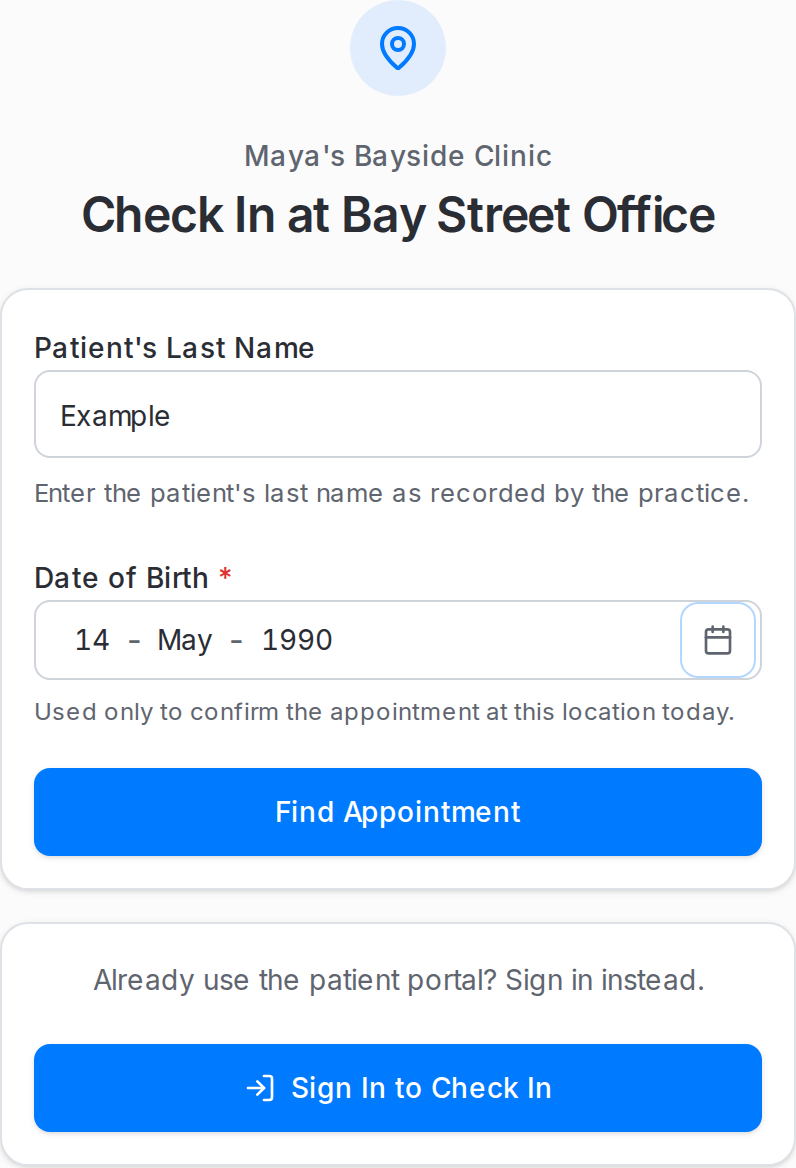
Guest lookup offers the alternative shown below. Enter Patient's Last Name as recorded by the practice, fill in Date of Birth, then tap Find Appointment. Use the patient's legal family name, not a preferred first name or the name of the person accompanying them.
Do clients need to sign in to use Oli's QR check-in?
Not if the practice has enabled guest appointment lookup. Clients can enter the patient's legal last name and date of birth to find today's appointments at the scanned location. If guest lookup is disabled, clients need to sign in to the patient portal. Either way, they review the appointment and tap Check In to record their arrival.
3. Review the appointment and tap Check In
After signing in or completing a successful lookup, the client sees the appointment details: Practice, Provider, Patient, Appointment Type, Start Time, and Duration. The start time includes the practice's time zone.
Read those details before continuing. If more than one appointment is listed, choose the one you are arriving for. Checking in to one appointment does not check in to every appointment on the list.
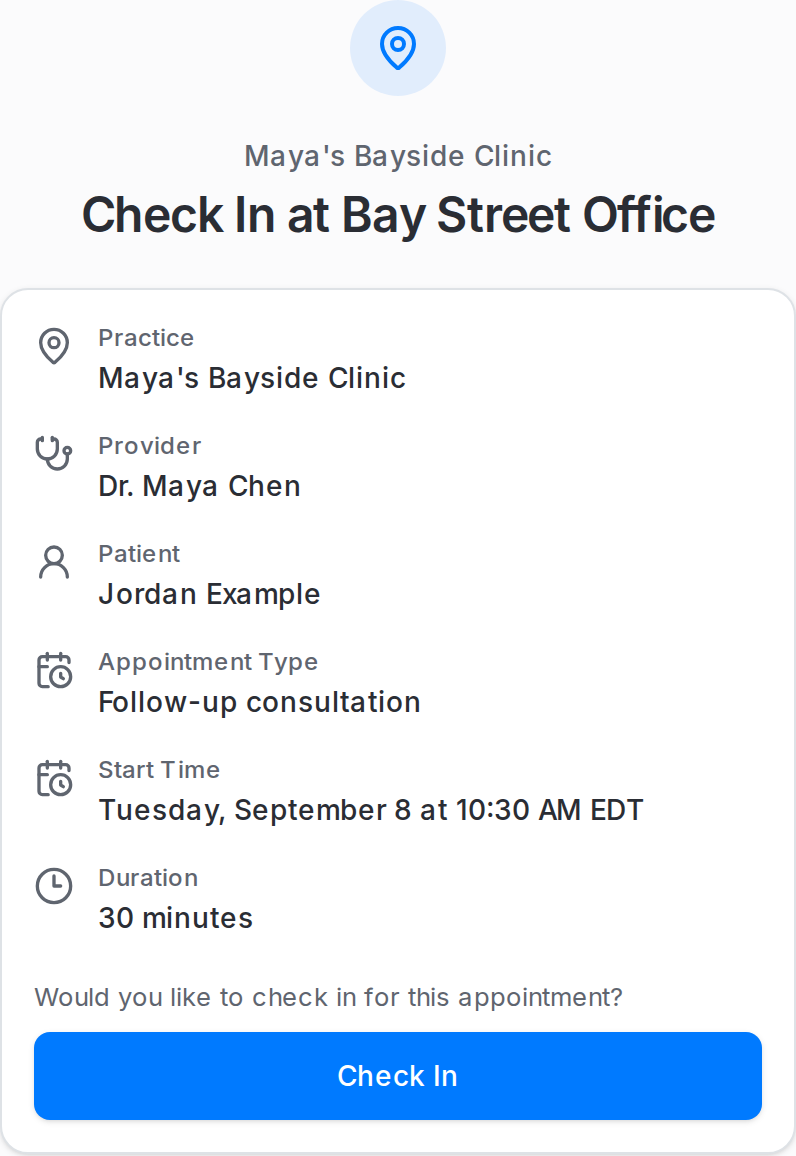
Tap Check In once and let the request finish. Finding an appointment is only the lookup step; this button is what records the arrival.
4. Wait for the confirmation
A successful check-in shows You're Checked In, followed by: "Please have a seat. Your provider has been notified that you arrived."
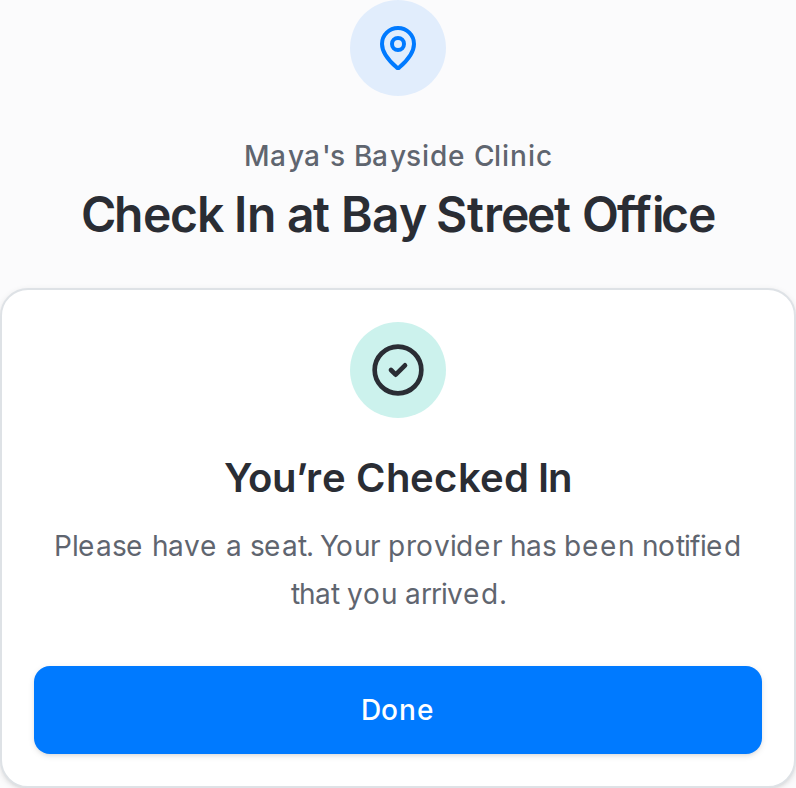
If the page shows an error instead, do not assume the arrival was recorded. Ask the front desk to check the appointment status.
What changes for the provider
The appointment moves to Arrived, and Oli records that the arrival came from patient self-check-in. An arrival message is added to the patient conversation, with wording such as "I've checked in for my 10:30 AM appointment." The provider also receives an in-app notification.
There is no separate arrival list to copy back into the schedule. The check-in updates the appointment your team is already working with in Oli's scheduling workflow.
It is still only an arrival confirmation. It does not complete an intake form, start a telehealth session, or mark the consultation as finished. Those remain separate parts of the visit.
Does scanning an Oli QR code automatically mark a client as arrived?
No. Scanning opens the check-in page for the practice location. The client must identify their appointment through portal sign-in or an enabled guest lookup, then tap Check In. A successful check-in changes the appointment to Arrived and triggers an arrival message and in-app notification for the provider.
If an appointment does not appear
QR check-in is for today's in-person appointments at the scanned location. "Today" follows the practice's time zone. It is not a way to book a new visit or check in to a future appointment.
Check these first:
- The location. Use the code displayed for the office where the appointment was booked.
- The day and appointment type. A future appointment or a telehealth booking will not appear as today's in-person check-in.
- The lookup details. For guest lookup, use the legal last name and date of birth held by the practice. Missing or different details may prevent a match.
- The appointment status. Cancelled, completed, and no-show appointments are not available for check-in.
If Oli cannot identify a matching appointment safely, it directs the client to the front desk. It does not ask them to pick from other patients with similar details. Repeated unsuccessful lookups can also be limited, so staff help is a better next step than trying many variations.
Keep that assisted route available for clients who cannot scan a code, do not have a phone or internet connection, or simply prefer to check in with a person.
What happens if a client uses Oli's check-in code twice?
Oli does not create a second check-in for the same appointment. When the client identifies the appointment again, it is shown as Already Checked In rather than offering another check-in. A guest may need to repeat the last-name and date-of-birth lookup when reopening the page.
When to replace the printed code
The code belongs to the location, not to an individual client or appointment. Keep using it while it remains active; there is no need to print a new one every morning.
If you choose Regenerate, Oli asks you to confirm the change. The old code stops working as soon as regeneration succeeds. Download the replacement and update every printed poster or digital display for that location. Leaving an old copy at reception will send clients to an unavailable check-in page.
Introduce it without making it mandatory
Start with one sign and a short explanation your team can use: "You can scan this code to check in on your phone. Sign in or use your last name and date of birth, then tap Check In. We can also check you in here."
Test that whole path with a demo appointment before asking clients to use it. Confirm that the right location appears, that the appointment can be found, and that the provider sees the arrival. Keep the front-desk option next to the QR sign, especially while regular clients get used to it.
For a small practice, this is one of the everyday handoffs worth testing alongside the bigger features when choosing an EHR for a solo practice. Our article on EHR usability and software design looks at why those routine interactions deserve attention.
Already using Oli? Open Settings > Practice > Locations and try your first check-in code. Exploring the platform? See the client portal or ask for a walkthrough of the arrival flow.